Most of us use Outlook at work for exchanging mail. Outlook is only a client side application which connects to Outlook Exchange server and downloads emails from the server. Any mail sent from Outlook will be sent to the email server and the server takes care of delivering the same.
It is quite common in projects we work on to set alert mails, which will keep sending hundreds of mails in a day. If Outlook on the desktop is open, we will have all rules set up and all alert mails will be moved to personal folders as soon as they are received. But this works only when the Outlook application is running on the desktop. If you are on vacation then the desktop will be switched off and all alter mails remain in the inbox. If you have to check any important mails, sifting through all unwanted mails will be very difficult.
Exchange Server also provides a web app which allows one to access emails outside the company network. Luckily the web app also allows to create email Rules.
How to create an email Rule on Outlook Web App?
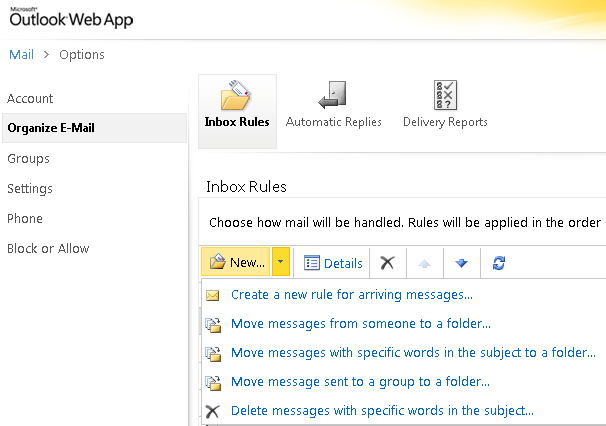
Creating a Rule on the Outlook Web App makes sure that the rule is applied before it reaches Outlook client on desktop. To create a new Rule, login to the web app, choose Options on the right top and click “Create an Inbox Rule”.

You will land in a new page which will allow to manage all email filtering Rules. Choose New> Create a new rule for arriving messages… A new window pops up asking for two inputs: “when the mail arrives” and “Do the following” .
Choose “It was received from” on the first drop-down box, choose the email address either form the address box or enter it in the text box at the bottom. Choose “Delete the message” in the next drop-down box and save the rule.

Once the new Rule is saved, all mails which come from the mentioned email address will be deleted and be sent to Trash automatically.
For advanced users, there is a “More Options…” link while creating a new Rule.
It allows specify multiple actions for the email if it matches the filter; such as forwarding to another mail address etc. Hence we can create rules which delete the mails as soon as the arrive and be forwarded to another email address. It also allows to mention Exception cases for the Rule. There are quite good number of exception cases such as “if the email comes with an attachment”, “if my mail address is in CC box” and so on.
There is also a check-box at the bottom which says “Stop processing more rules”, which disables any other rule matching the criteria. Finally after setting all conditions this is how our Rule looks:


